
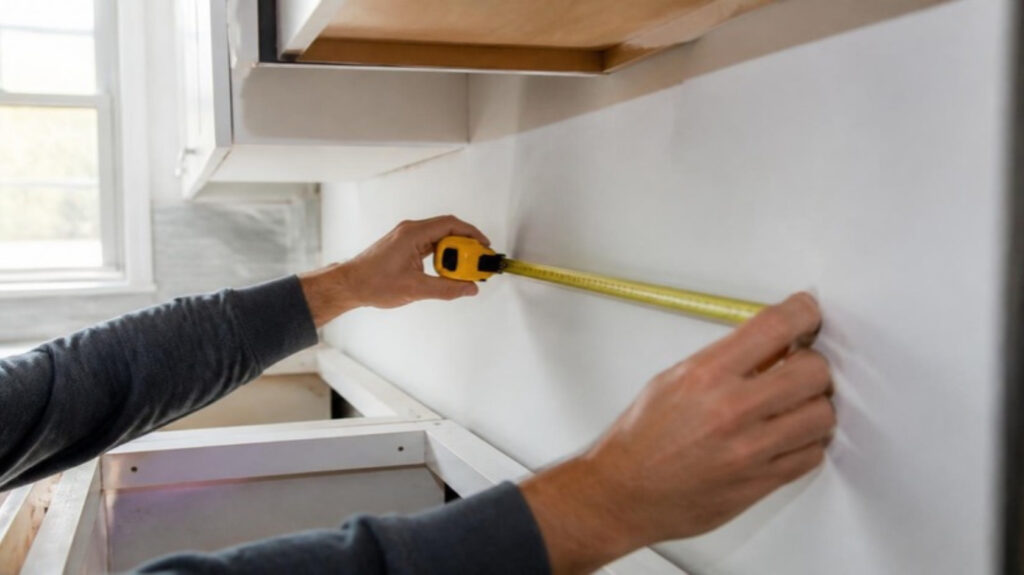
To measure a kitchen for new cabinets, sketch the room from above, measure each wall in inches at three heights, then record every window, door, utility and appliance as a distance from the same corner. If the segments along a wall add up to its full length, the sketch is ready for early planning.
This guide is for homeowners planning new cabinets who want an accurate record of their kitchen before they talk to a cabinet designer. It covers what to measure, in what order, and how to write it down so a cabinet designer can read it. It does not cover cabinet sizes, layout design or prices, and it does not replace the exact field measurements that are needed before cabinets are ordered.
Key Takeaways
- Draw one overhead sketch of the room, label the walls A, B, C and D, and write every number on it in inches and fractions, to the nearest 1/8 inch.
- Measure each wall at three heights: near the floor, at about 36 inches, and as high as you can reach. Record all three and circle the smallest.
- Measure windows and doors to the outside edge of the trim, and locate each one from the same corner of its wall.
- Record the center of every water line, drain, gas line, outlet, switch and vent, both across the wall and up from the floor.
- Check each corner with the 36, 48, 60 method: marks at 36 and 48 inches from the corner should be 60 inches apart.
- Add the segments along each wall. As a working rule of our own, measure again if the total differs from the overall wall length by more than 1/4 inch.
- Homeowner measurements are for early planning. Exact field measurements are needed before an order is placed.
In This Guide
- What tools and preparation do you need before you measure?
- How do you measure a kitchen for cabinets, step by step?
- What to record, in which unit, and where it is used
- How do you check whether a corner is square?
- Which clearances are worth measuring around the cabinets?
- How do you verify the measurements before you leave the room?
- Use the sketch for planning, then expect a field measurement
- FAQ
What tools and preparation do you need before you measure?
Measuring a kitchen for cabinets takes a steel tape measure, paper and a pencil, and it goes faster with a second person. Nothing has to be removed from the room. The existing cabinets can stay in place, because you are measuring the walls and what is fixed to them.
Gather these before you start:
- A steel tape measure of 25 feet or longer, with markings down to 1/16 inch
- Graph paper or plain paper on a clipboard, a pencil and an eraser
- A step stool for ceiling heights and upper wall readings
- A level, 2 feet or longer, or a straight board, for checking walls and floors
- Painter’s tape for marking points on walls and floors without damage
- A phone camera
- A second person to hold the end of the tape on long walls
Decide on your conventions first, because a sketch with mixed conventions is hard to read. Write every number in inches, not in feet and inches, so 10 feet 4 1/2 inches becomes 124 1/2 inches. Round to the nearest 1/8 inch. Measure every horizontal position on a wall from the same corner, and every height from the finished floor.
Clear the countertops and pull light furniture away from the walls so the tape can lie flat. If an appliance blocks a corner, measure to the appliance and write on the sketch that the corner itself was not reached.
How do you measure a kitchen for cabinets, step by step?
Measure a kitchen for cabinets from large to small: first the room and its walls, then the openings, then the utilities, then the appliances. Each step below ends with a visible result on the sketch.
- Sketch the room from above. Draw the outline of the kitchen as if looking down from the ceiling, with every door, window and opening. Label the walls A, B, C and D, clockwise. Result: one labeled outline, not to scale.
- Measure each wall at three heights. Measure corner to corner near the floor, at about 36 inches, and as high as you can reach. Where base cabinets block the low reading, take it just above the countertop instead and note on the sketch that the wall was not reached near the floor. Result: three numbers per wall, with the smallest circled.
- Measure the ceiling height in several spots. Measure floor to ceiling in each corner and once near the middle of the room. Where there is a soffit, which is a boxed-in section below the ceiling, measure its height from the floor and its depth from the wall. Result: at least five heights on the sketch.
- Measure windows and doors, including trim. For each opening, measure from the wall’s starting corner to the outside edge of the trim, then the width across the trim, then on to the next feature. For windows, add the height from the floor to the bottom of the sill trim and to the top of the trim. Result: a chain of segments along each wall.
- Mark the door swings. Draw an arc showing which way each door opens and note its width. Result: an arc at every door.
- Locate the plumbing. Measure to the center of the sink drain and of each water supply line, across from the corner and up from the floor. Result: two numbers per pipe.
- Locate gas, electrical and vents. Do the same for the gas line, every outlet and switch, the range hood duct, and any heating or cooling register in a wall, floor or toe-kick. A toe-kick is the recessed strip at the bottom of a base cabinet. Result: each item drawn as a symbol with two numbers.
- Record the appliances. Write down width, height and depth for each appliance you plan to keep, and its model number. For new appliances, keep the manufacturer’s specification sheet with the sketch. Result: a short appliance list beside the sketch.
- Check each corner for square. Use the 36, 48, 60 method described below. Result: one diagonal number at each corner.
- Note the obstacles. Mark anything that sticks out from or interrupts a wall: radiators, pipes, columns, beams, an attic hatch, a breaker panel, a sloped ceiling. Result: each obstacle drawn with its size and position.
The three-height reading in step 2 has a reason. A wall that leans is longer at one height than at another, and cabinets have to fit the shortest distance. The middle reading is taken at about 36 inches, which is countertop height. A Colorado State University Cooperative Extension fact sheet, Kitchen Planning Basics I (September 1992), gives 36 inches as the standard height of a base cabinet with its countertop. That publication is old, so treat 36 inches as a convenient measuring height and not as a specification.
What to record, in which unit, and where it is used
A cabinet sketch is complete when every item in the table below has a number next to it. Each measurement is recorded in inches and fractions, and each one answers a specific question during design. In our reading, a missing number can hold up the drawing at that wall until it is measured.
| What to record | Unit and format | Where it is used |
|---|---|---|
| Wall length at three heights | Inches, nearest 1/8; smallest circled | Total width available for a cabinet run |
| Ceiling height in each corner and mid-room | Inches, nearest 1/8 | Height of wall and tall cabinets, trim at the ceiling |
| Soffit height and depth | Inches from floor; inches from wall | Whether wall cabinets fit below or the soffit must change |
| Window and door position, from the wall’s starting corner | Inches to outside edge of trim | Where a cabinet run has to stop |
| Window and door width and height, including trim | Inches, outside edge to outside edge | Space left on each side and above |
| Window sill height | Inches from floor to bottom of sill trim | Whether a countertop and backsplash fit under the window |
| Door swing | Arc on the sketch, door width in inches | Conflicts between an open door and cabinets or appliances |
| Sink drain and water supply lines | Inches from corner and from floor, to center | Position of the sink cabinet |
| Gas line | Inches from corner and from floor, to center | Position of the range |
| Outlets and switches | Inches from corner and from floor, to center | Conflicts with cabinets, backsplash and appliance locations |
| Hood duct and air registers | Inches from corner and from floor or ceiling, plus size | Hood position, toe-kick and wall cabinet conflicts |
| Appliances | Width, height, depth in inches; model number | Openings left between cabinets |
| Corner diagonal | Inches, at 36 and 48 inch marks | How much adjustment a corner needs |
| Obstacles | Size and position in inches | Cabinets that must be modified or moved |
Our summary of the measurements a first cabinet drawing generally relies on. A designer may ask for more, depending on the room.
Write the numbers on the sketch itself, next to the thing they describe. A separate list of numbers is harder to match to the room. In our reading, a number without a position is the same as a number that was not taken. When the sketch is full, photograph each wall straight on and take one close photo of every utility, so the numbers can be matched to what is on the wall.
How do you check whether a corner is square?
A corner is square when a mark 36 inches along one wall and a mark 48 inches along the other wall are exactly 60 inches apart. This is the 3-4-5 rule from geometry, scaled to inches. In a right triangle with sides in the ratio 3 to 4, the long side is in the ratio 5.
Put a piece of painter’s tape on each wall at counter height. Measure 36 inches out from the corner on one wall and mark it, then 48 inches out on the other wall and mark it. Measure the straight line between the two marks and write that number in the corner of your sketch.
| Diagonal between the marks | What it tells you |
|---|---|
| 60 inches | The corner is square at that height |
| Less than 60 inches | The walls close in: the corner is tighter than 90 degrees |
| More than 60 inches | The walls open out: the corner is wider than 90 degrees |
Our summary, based on the 3-4-5 right-triangle rule. Where a wall is shorter than 48 inches, use 18, 24 and 30 inches instead.
Record the number even when it is not 60. An out-of-square corner is ordinary and is not a defect to fix before you get a quote. What matters is that the designer knows about it, because cabinets are built square and the difference has to be taken up somewhere.
Two more checks belong with this one. Hold the level upright against each wall to see whether it leans, and lay it on the floor along each wall to see whether the floor slopes. Note the direction of any lean or slope on the sketch. This article cannot tell you how much is acceptable, since that depends on the cabinet line and on how it is installed.
Which clearances are worth measuring around the cabinets?
The clearances worth measuring are the open floor distances in front of counters and appliances, and the widths of doorways. Cabinets are drawn against walls, but the layout is judged by the space left for people to stand and walk.
The National Kitchen & Bath Association (NKBA), a trade association, publishes planning recommendations in its Kitchen Planning Guidelines with Access Standards. NKBA published a fifth edition of its Kitchen & Bath Planning Guidelines in 2026. The figures below come from the earlier, undated edition, so check them against the current edition before relying on one.
A landing area is counter space next to a sink or appliance where things can be set down. NKBA measures it as countertop frontage, the length along the front of the counter. A work aisle is the floor space where someone stands to work, measured between counter fronts, tall cabinets and appliances. A walkway is a path through the room.
| NKBA guideline | Recommendation |
|---|---|
| Guideline 1, door entry | Clear doorway opening of at least 32 inches |
| Guideline 6, work aisle | At least 42 inches for one cook, at least 48 inches for multiple cooks |
| Guideline 8, walkway | At least 36 inches |
| Guideline 10, sink | Landing area of at least 24 inches on one side and at least 18 inches on the other |
| Guideline 13, dishwasher | Nearest edge within 36 inches of the nearest edge of a cleanup or prep sink |
| Guideline 16, refrigerator | At least 15 inches of landing area, on the handle side or in one of the other positions the guideline lists |
| Guideline 17, cooking surface | At least 12 inches of landing area on one side and 15 inches on the other |
Source: National Kitchen & Bath Association, Kitchen Planning Guidelines with Access Standards, earlier undated edition. These are planning recommendations; this article does not state what any building code requires.
The older Colorado State University Cooperative Extension fact sheet cited above (1992) gives similar figures. It advises checking that traffic lanes are at least 36 inches wide and that at least 48 inches is left between cabinets and appliances that face each other.
For your sketch, this means three extra measurements. Record the clear width of each doorway, the distance between facing counters or between a counter and an island, and the distance from a counter edge to any wall or table opposite it. With those numbers, a designer can see whether a deeper cabinet or a larger island would narrow an aisle below the recommended width. The landing area rows need no extra measuring: your wall and appliance numbers already show how much counter fits beside each one.
How do you verify the measurements before you leave the room?
Verify the measurements before you leave the room by adding the segments along each wall and comparing the total with the overall wall length. If the two numbers agree, the chain of positions is consistent. If they do not, one of the segments is wrong and the wall should be measured again.
Take wall A as an example, with one window, measured from the left corner:
| Segment on wall A | Length |
|---|---|
| Left corner to outside edge of window trim | 31 1/4 inches |
| Window, trim edge to trim edge | 39 1/2 inches |
| Window trim to right corner | 71 3/4 inches |
| Sum of segments | 142 1/2 inches |
| Wall measured corner to corner at the same height | 142 1/2 inches |
Our summary: a worked example with invented numbers, to show the check.
Example sketch of wall A with the same invented numbers as the table above.
As a working rule of our own, accept a difference of up to 1/4 inch between the sum and the overall length, and measure again beyond that. Run the same check on heights: floor to sill, plus window height including trim, plus the distance from the top of the trim to the ceiling should equal the ceiling height at that spot.
Then run through the checks below before you put the tape away. Errors are easier to catch in the room than at a desk. Each check targets a mistake that changes a cabinet drawing and that a photo cannot correct later.
- Is every number in inches? Look for any entry written in feet and inches, such as 10-4, which can be read as 104 inches.
- Did each horizontal measurement on a wall start from the same corner? An arrow on the sketch should show the direction.
- Were windows and doors measured to the outside edge of the trim, not to the glass or the door slab?
- Does every wall have three length readings, and is the smallest circled?
- Was the ceiling measured in each corner and near the middle, not in one spot?
- Are pipes, outlets and vents located by their centers, with a second number for height?
- Was the tape straight and level, and was the reading taken at the hook end, not estimated around a bent tape in a corner?
- Are fractions written clearly? Write 30 1/2 with a space, so that it cannot be read as 301/2.
- Is each soffit, radiator, column or sloped ceiling on the sketch, with a size?
- Did you note which appliances stay and which will be replaced?
A reading that looks odd deserves a second measurement. If two walls that face each other differ by several inches, the room may not be rectangular, and that is useful information, not an error. Write both numbers down as measured.
How far to go depends on what you are planning:
| Your situation | What to measure | Why |
|---|---|---|
| Same layout, new cabinets | Everything in the record table | The new cabinets must fit the existing openings and utilities |
| Sink, range or refrigerator will move | The record table, plus the path between the old and new positions | The new position has to be drawn in relation to existing lines |
| A wall will be removed or added | Existing walls, plus the adjoining room | The cabinet walls do not exist yet in their final form |
| New construction or a gutted room | Dimensions from the plans, marked as plan dimensions | Finished walls can differ from the drawings |
| Cabinets block a corner or a pipe | What you can reach, with a note on what was hidden | A wrong guess is harder to catch than a labeled gap |
Our summary of how the scope of measuring changes with the project.
This method has limits. It assumes finished walls and a floor that will stay at the same height. New flooring, new drywall or a new tile backsplash can each change a measurement, so tell the designer about any planned change of that kind.
Use the sketch for planning, then expect a field measurement
Keep the sketch, the appliance list and the photos together, and treat the numbers as a starting point. Measurements taken by a homeowner are suited to early planning and a first layout. Exact field measurements are needed before cabinets are ordered, because an order is built to the numbers on the drawing.
When you finish, check that you have these in one folder: the overhead sketch with walls labeled, three length readings per wall, ceiling heights, the corner diagonals, the appliance list with model numbers, one photo per wall, and a note of anything you could not reach.
UST Kitchen & Bath has a showroom in Richardson, Texas, and our team brings over 30 years of experience to kitchen and bathroom projects.
Contact UST Kitchen & Bath about your new kitchen cabinets
Frequently Asked Questions
How much space should I leave behind counter or island seating?
When no one passes behind a seated diner, the National Kitchen & Bath Association recommends at least 32 inches of clearance behind the seating. Where people do pass, it recommends at least 36 inches to edge past and at least 44 inches to walk past. These figures come from the same earlier edition as the clearance table above. To compare your room, measure from the counter edge where stools would go to the nearest wall or obstruction behind them.
How far apart should the sink, range and refrigerator be?
The National Kitchen & Bath Association recommends that, in a kitchen with three work centers, the three distances between them add up to no more than 26 feet. No single leg should be shorter than 4 feet or longer than 9 feet. Like the clearance table, these figures come from the earlier edition of its guidelines. If the sink, range and refrigerator are located on your sketch from the wall corners, the distances can be worked out from the sketch.
Can I use a laser distance measure instead of a tape?
A laser distance measure can be used for long wall lengths and ceiling heights. A steel tape is easier for short segments such as trim widths and pipe positions, where the laser has no flat surface to hit. If you use both, check one wall with each tool to confirm they agree.
Sources
- National Kitchen & Bath Association (NKBA), Kitchen Planning Guidelines with Access Standards, earlier undated edition (PDF), accessed October 2026. Trade association; doorway, work aisle, walkway, landing area, seating clearance and work triangle recommendations.
- National Kitchen & Bath Association (NKBA), Newly Updated Kitchen & Bath Planning Guidelines, announcement of the fifth edition, June 4, 2026.
- Leslie Clagett, NKBA Releases Updated Planning Guidelines, Kitchen & Bath Business, July 29, 2026. Trade publication report on the fifth edition.
- C. Birdsong, Kitchen Planning Basics I, fact sheet no. 9.520, Colorado State University Cooperative Extension, September 1992. University extension publication; 36-inch counter height, traffic lane and facing-cabinet distances.